GDPR Cookie Consent Banner for a Webflow website


Are you using Webflow to create your website? You are not alone, as of September 2020 240,998 websites were built on Webflow. At Privado, we love Webflow and have used it to manage our website from the beginning. Apart from creating beautiful websites, you also need to manage cookies that you are using on your Webflow website. In this post, we summarize how to create a GDPR webflow cookie consent banner for your Webflow website.
What is a GDPR Cookie Consent Banner?
GDPR and ePrivacy Directive(Cookie Law) requires websites to take consent from users before the use of cookies. This cookie consent in webflow is taken from users with the help of a cookie consent banner. Here is an example of a GDPR compliant cookie consent banner of webflow webflow website:

Cookie Banner should have the following to be GDPR compliant:
- Accept, Deny Buttons
- Auto-Block cookies till user gives consent
- Granular cookie consent option to users via Settings
- Link to Cookie Policy
You can read our post on GDPR Cookie Consent Solution for more details.
Getting Started
Please note that this integration guide utilizing custom code feature for Webflow and is only available for paid accounts. First, you will need to create an account on Privado's Cookie Consent solution. For details on how our cookie consent tool work, please check our knowledge base.
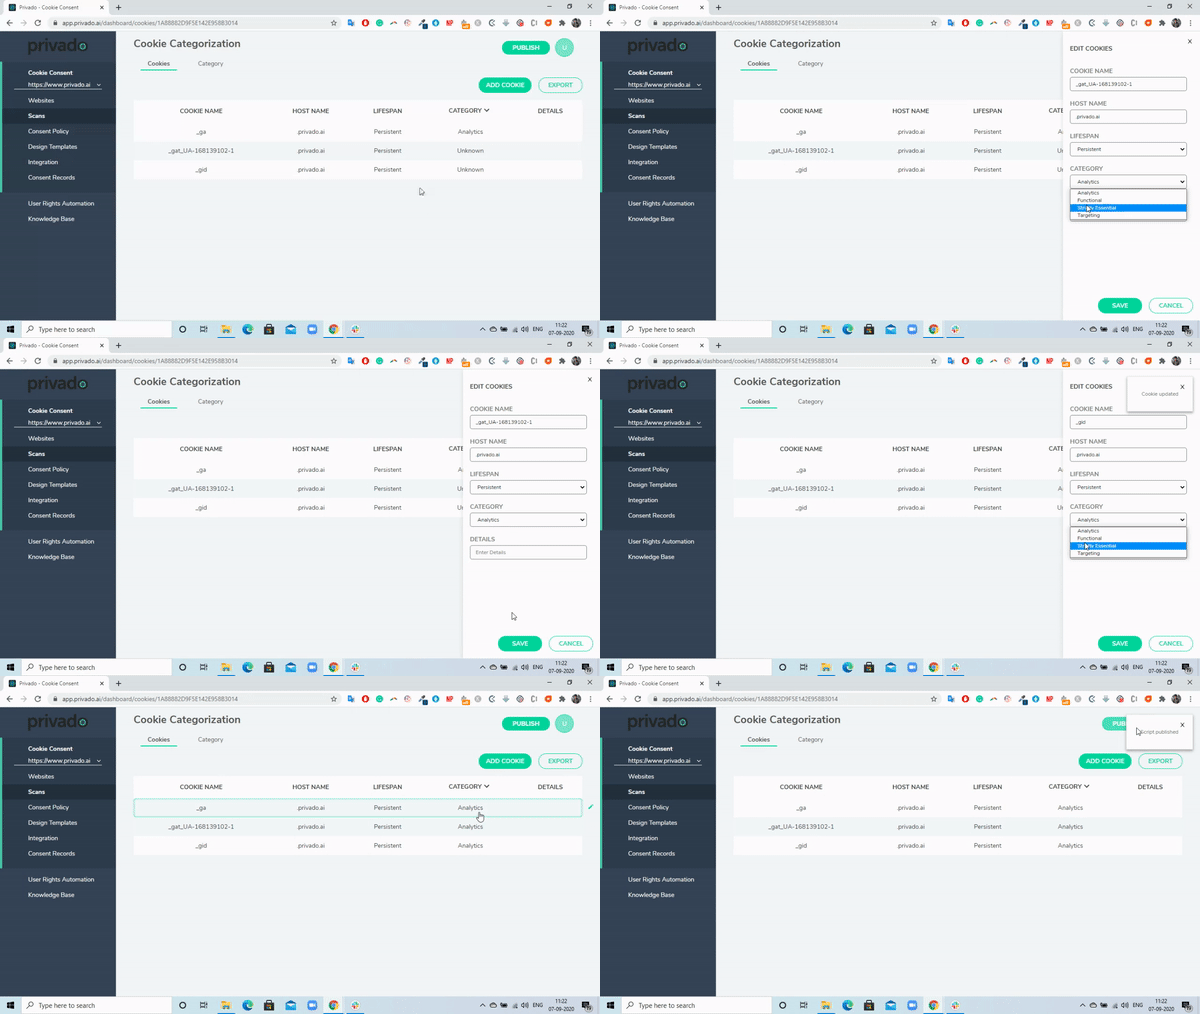
Categorizing Cookies:
We conduct a deep scan of your website and generates a list of cookies that you are using. We auto-categorize them into different categories, some of the lesser known cookies are not categorized and you should do so. More details on categorizing cookies.
Designing Cookie Banner:
You can customize the cookie consent banner based on your website styling including text color, button color, background color and the text which has to be displayed. Refer to our article for more details on styling of the cookie consent banner.

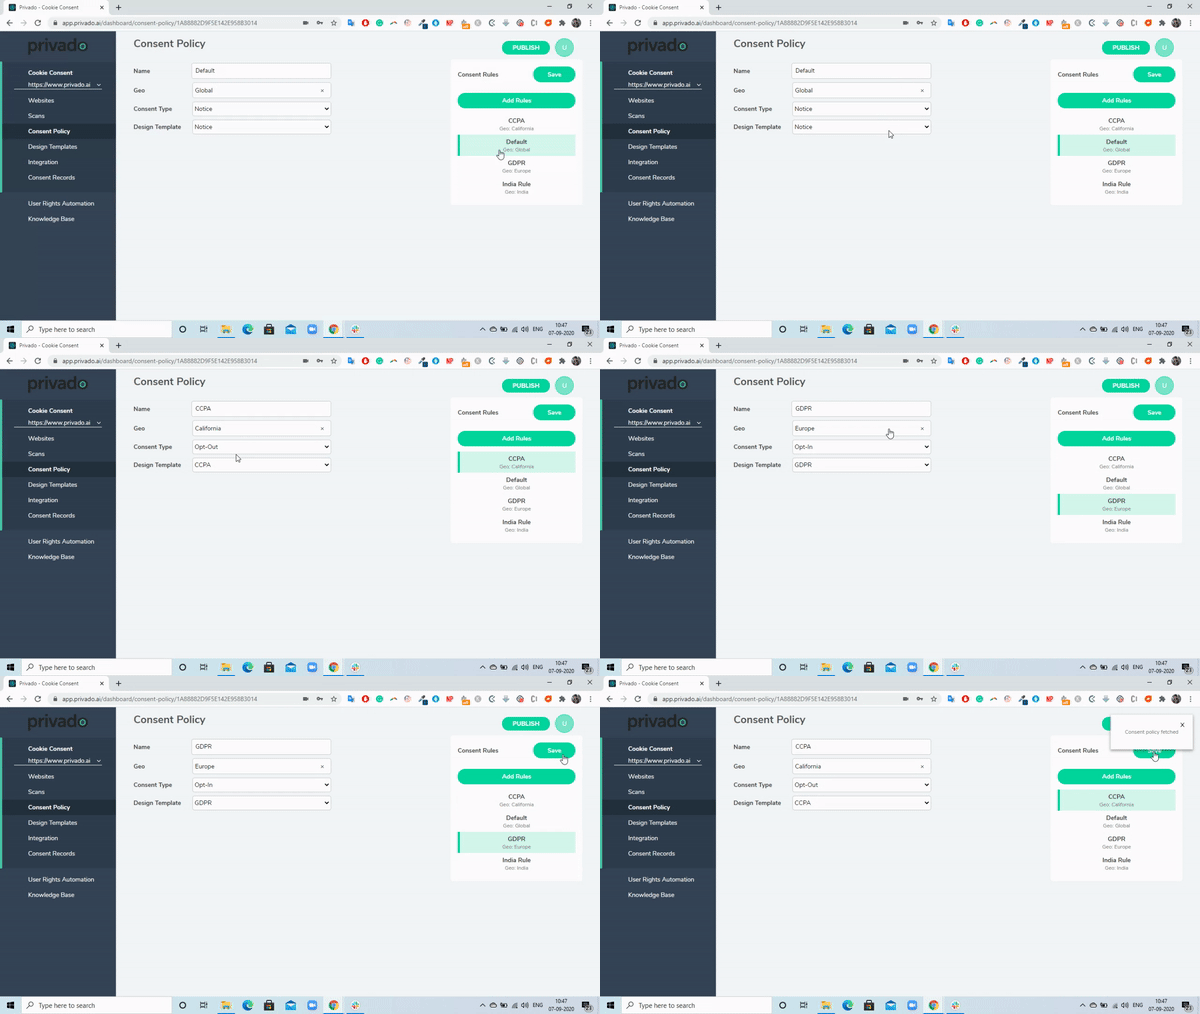
Geo-Targetting Users:
Each country has their own requirements on the use of cookies. Europe has a strict Opt-In requirement, whereas California with CCPA has a Opt-Out requirement. You can geo-target users and display the right cookie consent banner with Opt-In/Opt-Out flow using our product. Here is a detailed article on how to set geo-targetting with Privado.
Publishing Javascript
Once you have made all the changes, hit the Publish button at the top to make these changes live. Go to the Integrations tab and copy the Javascript code. This single line of code will be used to integrate the cookie consent banner in Webflow.

Adding Cookie Consent Javascript to Webflow
Go to the project settings of your Webflow website and navigate to the Custom Code tab. Here in the Head Code, add the Javascript right at the top.
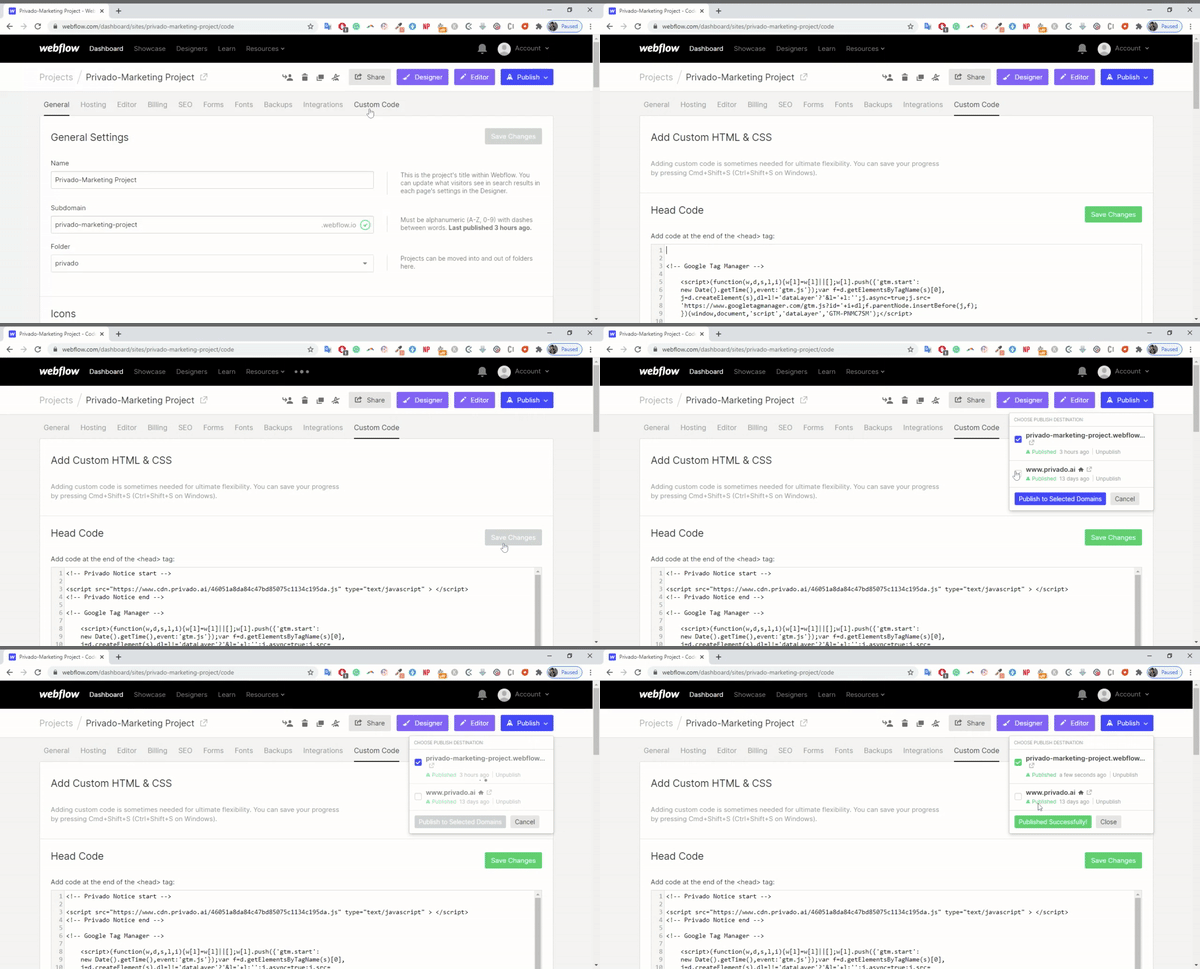
Please ensure there is no script above Privado's Cookie Consent Javascript so that no script loads before cookie consent script and cookies can be auto-blocked. Once you add the script, click on Save and Publish the changes. We recommend you to first publish these changes on your staging website and confirm if the banner is shown correctly, cookies are being blocked. Once you have verified it, please Publish the Cookie Consent Javascript to main website.
That's all you have successfully installed GDPR Cookie Consent Banner on your Webflow website.
Some other popular options are:
- Install Cookie Consent in Squarespace the most used website builder
- Read this for Wordpress Cookie Consent

Vaibhav is the CEO and co-founder of Privado.ai and a CIPM certified privacy professional.


